Crissie McDowell
Three simple tips to take your smartphone photos to the next level.
I rarely lug around my big Canon camera these days. It’s lovely, but heavy. For all of my everyday moments, my smartphone is my go-to, on-the-fly, capturing-life’s-moments-and-random-meals-to-overshare-on-social-media camera. I recently went on a trip to Thailand and ONLY packed my phone.
It says a lot to trust my iPhone X’s 12mp camera in one of the most beautiful places on earth. It absolutely nailed it.


Smartphones take really good pictures. Well, they’re capable of taking great photos. It’s the same way an oven can make the best swiss roll of your life if the baker follows the right, precise measurements and instructions. It could also end up a burnt log of despair.
The tiny lens in your pocket is an incredibly powerful tool that can produce stunning results when the recipe is followed. Here are some tips to take your images to the next level:
Smartphone Photography Lighting
-
LIGHTING
- Use natural light as much as possible. If you’re inside, put your back to a window and pull your subject towards you. The window acts as a natural light diffuser and gives your subject the most even and flattering lighting. You can even have your subject’s side towards the window. Don’t put your subject’s back to the window. Back is wack. When your subject’s back is to the window, they will appear dark.
Above, left to right: subject’s back to window, photographer’s back to window, photographer and subject’s side to window
- If you’re outside, find indirect lighting. That means that something is blocking the sun from slapping your subject in the face. Find shade from a tree, building, your hand. It will soften the lighting and make it look less harsh.
- Turn off overhead lights when possible. They can cast an icky yellow light.

Above: Natural lighting on left and yellow cast overhead light on right
Smartphone Photography Composition
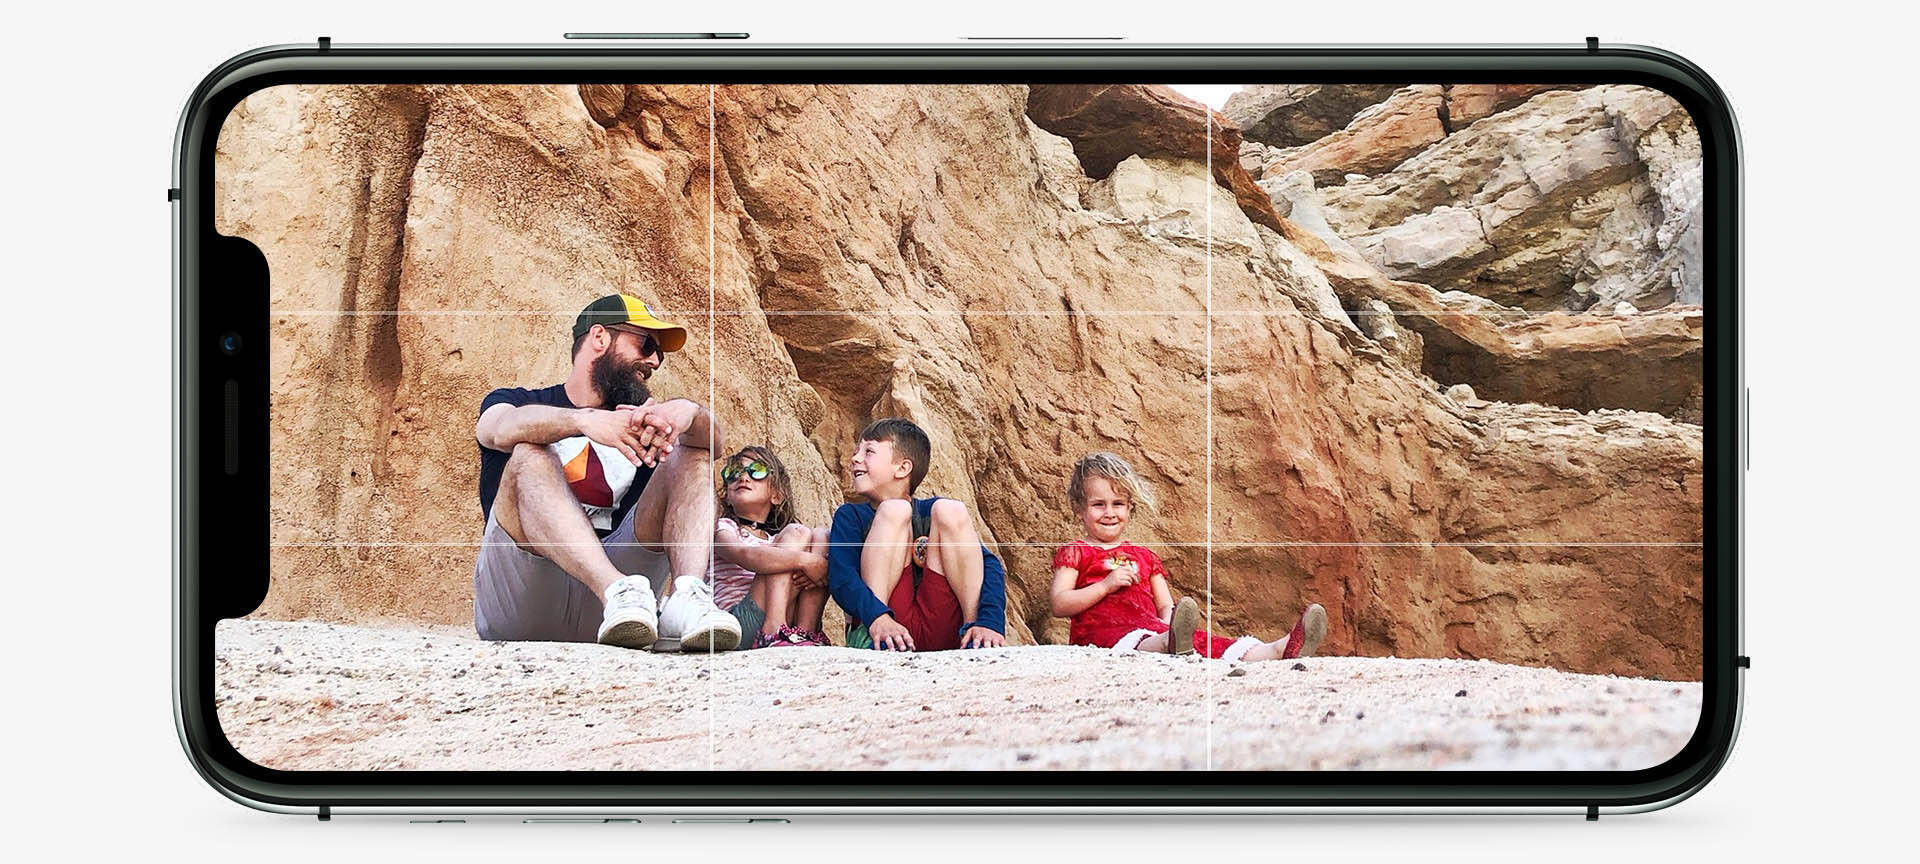
2. COMPOSITION
- Get it straight: your shot will end up looking more composed and intentional if you simply straighten your horizon line.

- Rule of thirds: an off-center composition is more pleasing to the eye. Images are divided up by placing your main subject into one of the sections you build balance and interest.

- Angles: instead of shooting straight on at your subject, try shooting directly overhead and down on the subject, or get low to the ground to shoot.

Smartphone Photography Editing
3. EDITING
This is the icing on your now, almost perfect cake.
Don’t over edit with filters. Keep it clean, consistent and I beg of you, stop using the skin smoothing filters. Skin should have texture.
Lightroom Mobile
My main squeeze with smartphone photography these days is Lightroom mobile. I use this because it is a very similar editing process to what I use for editing my professional photography. It gives the photographer a lot of flexibility. I can even use the same presets that I use with my professional camera desktop editing to get a consistent look.
I have been enjoying the Light and Airy Presets that you can purchase here.
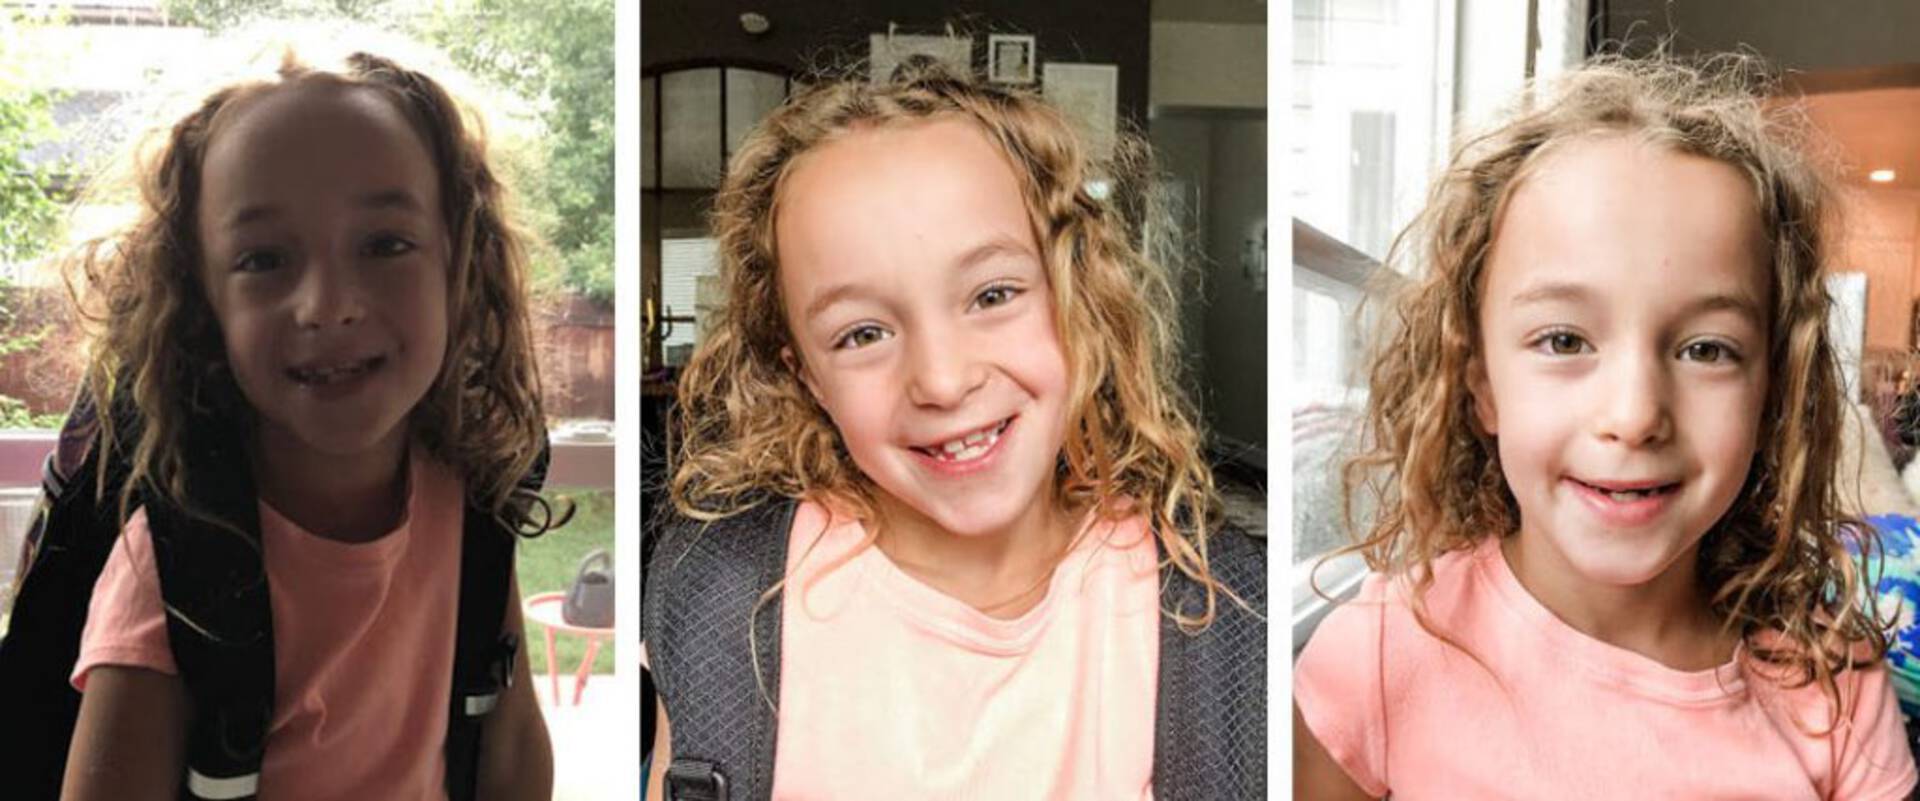
Before and after:

Color Story
Easy to use, clean and bright filters. Color Story is a free app with in-app purchase options for additional filters. The included filters are honestly great. These filters are bright, clean and colorful.
Before and after:

Smartphone Photography BONUS TIPS:
- Moms…get in those photos. Lean your smartphone up on your coffee mug, purse, or toy car in your bag. If the self timer is on, your iPhone will automatically take a sequence of 10 photos.
- Then heart your favorites and delete the rest. Shoot more. Delete later.
- Additional Tip: This isn’t an official tip. It’s just an intro to Smartphone photography 101, inspired by my mom’s hazy images. Give your lens a quick polish with your shirt before you shoot. Chances are, you pulled your phone out of your purse or a sweaty back pocket. Also, face grease. Lenses get smudgy fast. Smudgy lenses lead to blurry photos, mom.